Advance & draw sermon slides from a tablet — tap, pens, and large-type notes
How to run sermon slides from a tablet: tap to advance, step chips for annotation reveals, draw on slides, Scroll vs Swipe navigation, and Display Settings for text size, line spacing, and margins.
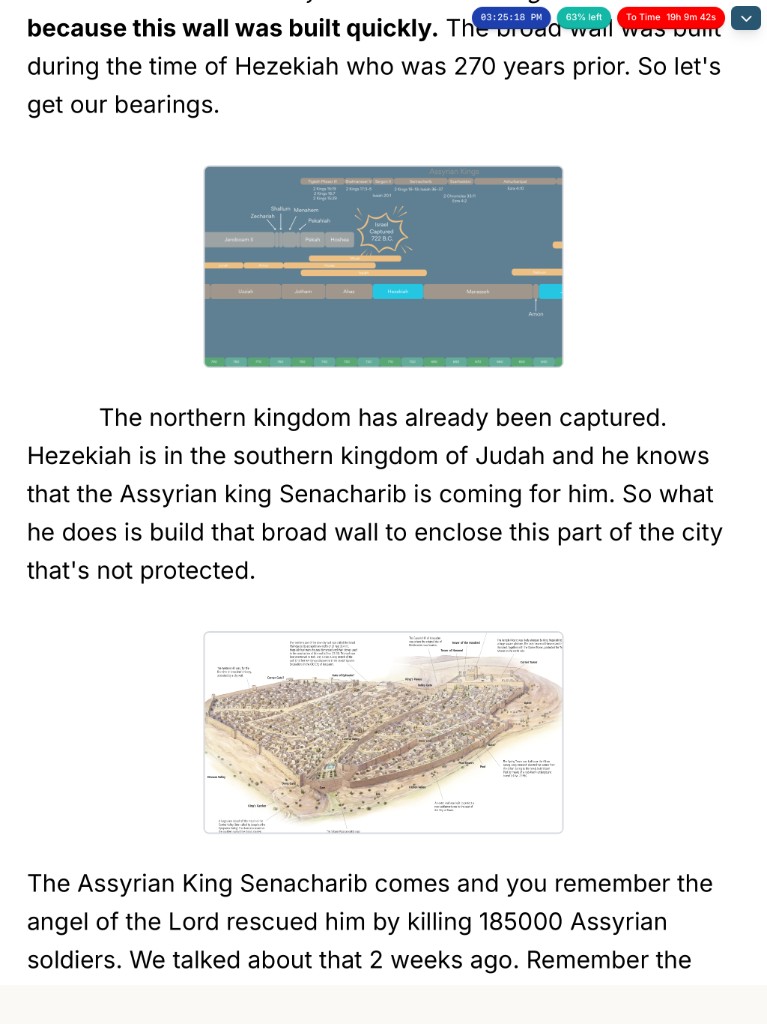
The best sermon slides fail if advancing them feels like operating a booth. BibleSlides’ tablet presenter is built so preaching stays simple: tap the slide to advance, tap a step chip for the next bible markup reveal, draw when a live circle helps, and read large-type notes under the slide you’re on.
If the control surface needs a training manual mid-sermon, it’s the wrong control surface.
Tap to advance (no clicker required)
With the tablet connected to the live slideshow (QR Connect Tablet, or AirPlay/HDMI from the device), tap the slide to move forward. The house projector follows. Native apps can give a light haptic so you feel the advance without watching the big screen.
That’s the core loop for sermon slides: see the note → say the point → tap → next visual.
Step chips — advance bible markup, not just “next slide”
Stepped sermon slides (verse annotations, image reveals, maps, and more) show numbered chips in your notes, labeled like 1: focus or 2: Highlight +1. Tap the chip to advance that teaching beat. Tap the main slide area when you want to reset toward the home/base view of that slide.
That keeps bible annotation timed to your words — without laser-pointer chaos or PowerPoint animation roulette.
Draw on slides when a live mark helps
Sometimes the prepared annotation isn’t enough — a guest question, a last-second contrast, a word you want circled now.
- Open Draw on slide from the slide corner
- Use the pen toolbar (colors and line width from Display Settings → Pens)
- Marks sync to the projector
- Exit drawing mode to go back to normal advance
- Reload presentation can clear drawings when you want a clean slate after practice
Rule of thumb: prefer pre-built annotation steps for planned points; use live draw sparingly so the screen doesn’t become a whiteboard.
Display Settings that make notes preachable
Open Display Settings before the service and set it once for your venue:
| Control | Why it matters on stage |
|---|---|
| Text Size | Arm’s-length reading without leaning into the glass |
| Line Spacing | Dense manuscripts stay scannable |
| Slide Size | Balance how large the embedded sermon slide appears in the notes column |
| Margins | Clear of bezels and your thumbs |
| Navigation: Scroll vs Swipe | One long scrolling document vs page-like swipes — pick what matches how you preach |
| Minimap | Optional thumbnail strip to jump in a long deck |
| Pens | Sidebar vs top bar for the drawing toolbar; pen colors and line width |
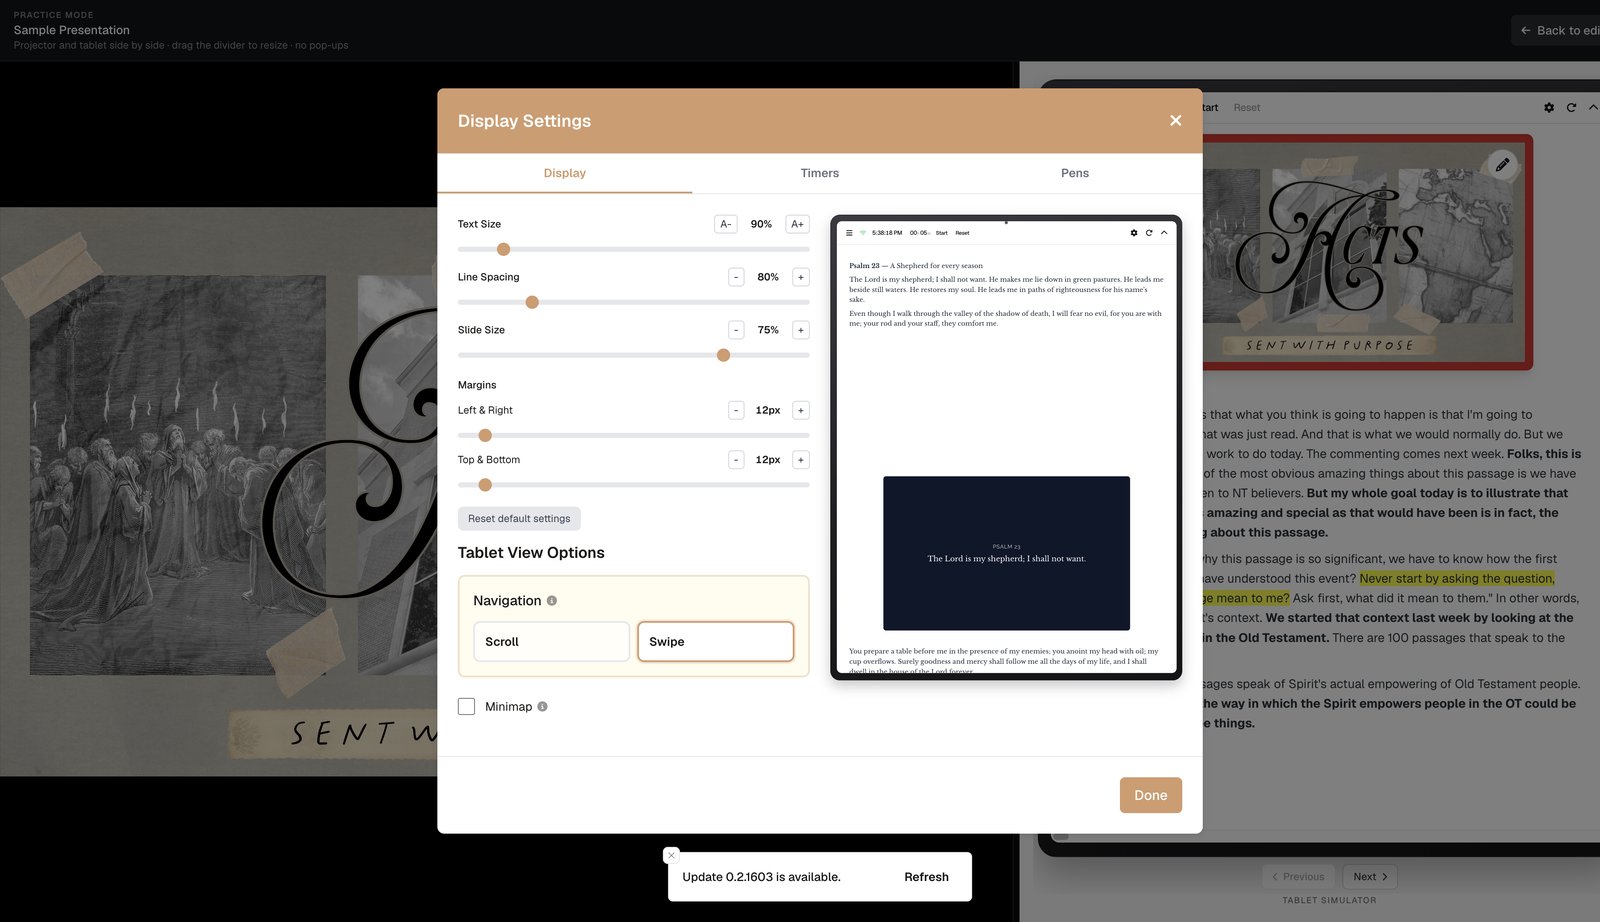
Marketing line we mean literally: large-type content designed for arm’s length on stage.
Practice mode before you trust it live
Practice mode puts projector output and the tablet simulator side by side in one browser tab — drag the divider, no pop-up storm. Tap slides on the tablet pane to confirm advance and step order. Fix Display Settings here, not during the welcome.
Then on Sunday: Launch Slideshow on the booth (or external display), Connect Tablet, preach.
Connection basics (so advance actually lands)
- Green connection = tablet linked and slideshow active
- If an advance doesn’t land, the tablet can warn and revert so you don’t keep talking past a frozen house screen
- Prefer solid booth Wi‑Fi; for flaky networks, Make available offline on the project (new Bible lookups and some cloud media still need net)
Quick checklist
- Build sermon slides + notes on laptop
- Tablet: Display Settings → Text Size + Navigation preference
- Practice mode once — tap through steps
- Sunday: connect tablet → tap to advance → draw only if needed
- Optional: enable timers and % left in the same Display Settings modal
Related guides
See BibleSlides features
Notes and slides in one document, Bible Verse slides, stepped markup, Verse Analysis, 3D maps, BiblePlaces photos, and tablet presenter apps — built for pastors who teach Scripture.