Bible annotation & markup for teaching — how to mark Scripture the room can follow
Bible annotation and bible markup done for the sanctuary: stepped highlights, boxes, labels, arrows, and original-language callouts timed to your sermon — plus best practices for presenting clearly.
Bible annotation and bible markup usually mean two different things online: study-app highlighting in Logos or a PDF, and messy PowerPoint pens on Sunday. Neither is built for the moment you say, “Look at this phrase,” and the whole room needs to see the same words at the same time.
BibleSlides treats bible markup as a teaching beat — stepped annotations on a Bible Verse slide, advanced with your notes, timed to the sermon.
Good bible annotation isn’t denser underlining. It’s one clear mark, revealed when you teach it.
What bible annotation means when you’re teaching
| Context | Typical “annotation” | What the congregation needs |
|---|---|---|
| Personal study | Highlight + notes for you | Nothing — private |
| Logos / study apps | Resource-linked markup | Still private unless you rebuild slides |
| PowerPoint / lyric software | Pens, shapes, duplicate slides | Readable, timed, consistent |
| BibleSlides | Stepped markup on the verse | Same — by design |
If you search for bible annotation or bible markup as a pastor or Bible teacher, you usually want the third row: sanctuary-ready Scripture markup, not another study highlighter.
Features that make bible markup work on screen
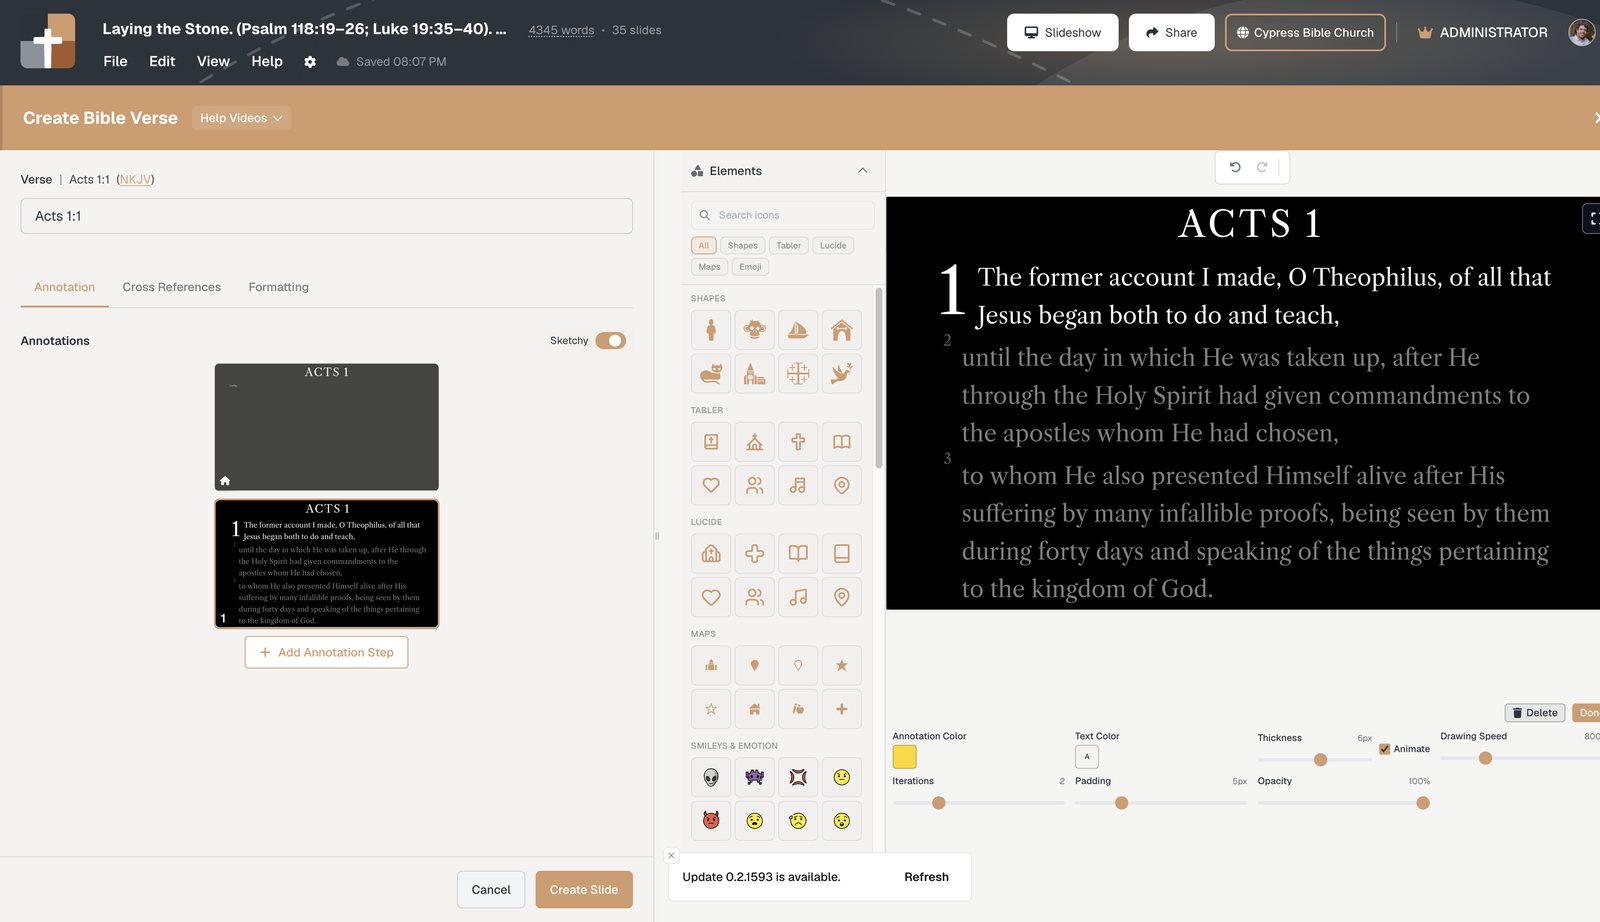
In BibleSlides, markup lives on the Bible Verse slide (Annotation tab), not as freehand ink over a screenshot.
What you can build:
- Highlights on exact words or phrases
- Boxes around a clause you want the room to hold
- Labels that name a theme, role, or contrast
- Arrows that connect two parts of the verse
- Color, thickness, opacity, and animate so reveals draw in cleanly
- Reorderable steps — each advance is a teaching beat (
1: focus,2: Highlight +1, etc.) - Ω original-language callouts when a Greek or Hebrew lemma needs a brief on-verse note
- Notes under the slide so your advance cue sits where you’re already reading
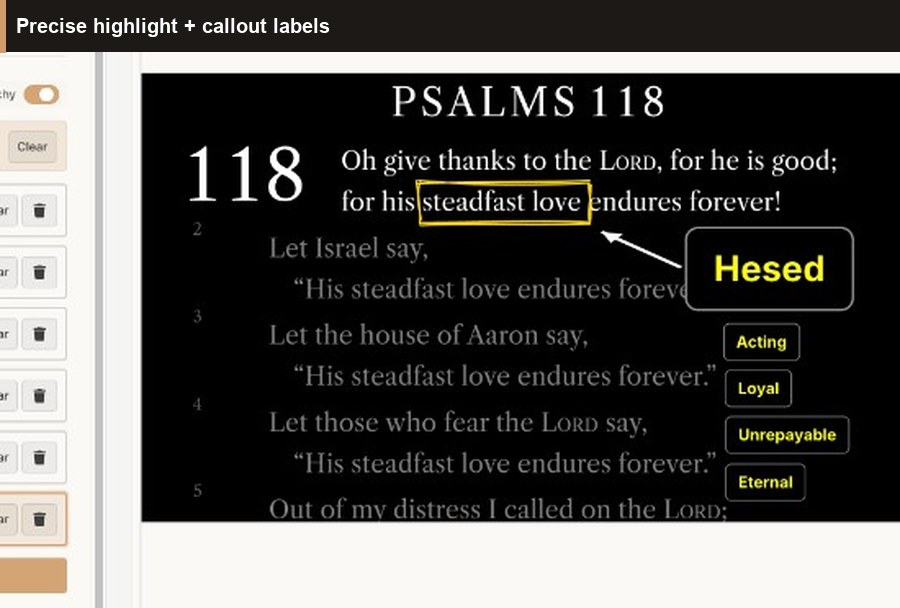
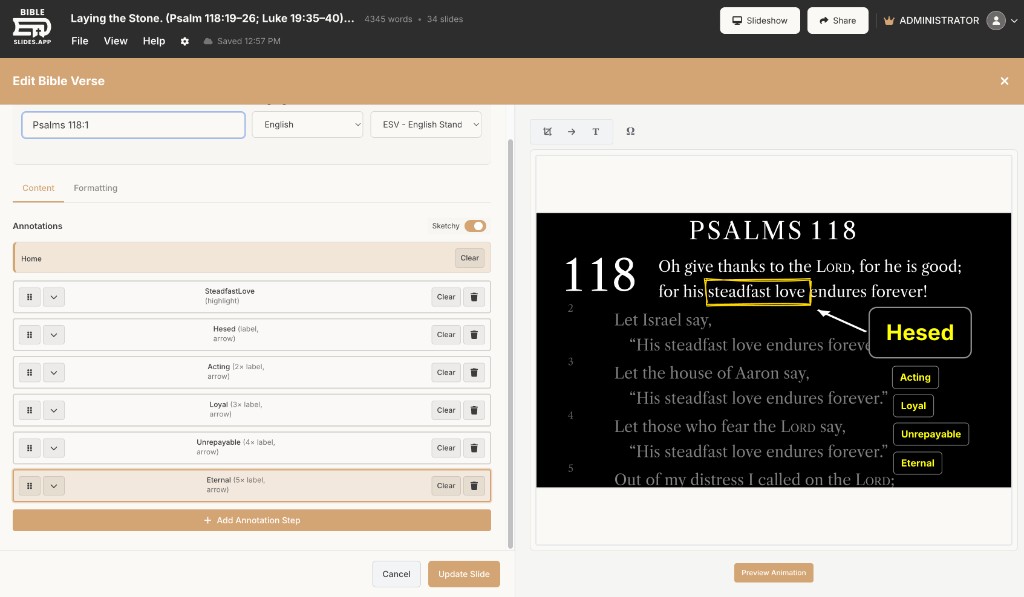
That is the difference between “I marked my Bible” and “the sanctuary can follow my bible markup.”
Best practices: how to annotate Scripture for presentation
1. Mark for the ear, not for your study page
Study Bibles get dense. Sanctuary slides should not. Prefer one new mark per advance. If you need five insights, use five steps — not five colors on the first click.
2. Build the order you’ll speak
Write (or outline) the point, then add annotation steps in speaking order. If you rearrange the sermon, drag the step list — don’t redraw shapes.
3. Use contrast, not clutter
- Dim surrounding verses so the active line carries attention
- Pick one accent color per point (yellow highlight or box — rarely both at once)
- Save loud arrows for relationships (“if → then,” “not A but B”)
4. Name what you mark when you advance
Silent markup feels like decoration. Say the phrase as you click: “Notice steadfast love…” The annotation confirms what you said; it doesn’t replace it.
5. Keep lexical depth on a leash
Ω callouts and Definition / Verse Analysis slides are powerful. Use them when the lemma carries the point. Otherwise a simple highlight is clearer for guests.
6. Rehearse the click rhythm once
Run practice mode or advance from the tablet once. You’re checking timing: too many steps feel twitchy; too few dump the whole argument at once.
How to present bible markup well on Sunday
| Do | Don’t |
|---|---|
| Advance from tablet with notes + step chips visible | Draw live with a laser while talking |
| Let the house screen show only Scripture + markup | Flash your private notes on the projector |
| Pause a half-beat after each reveal | Click through three highlights mid-sentence |
| Pair a key mark with a Bible Photo or map when place matters | Stack every tool on one slide |
| Use Campus QR follow-along so back rows see the same markup | Assume everyone can read 28pt from the balcony |
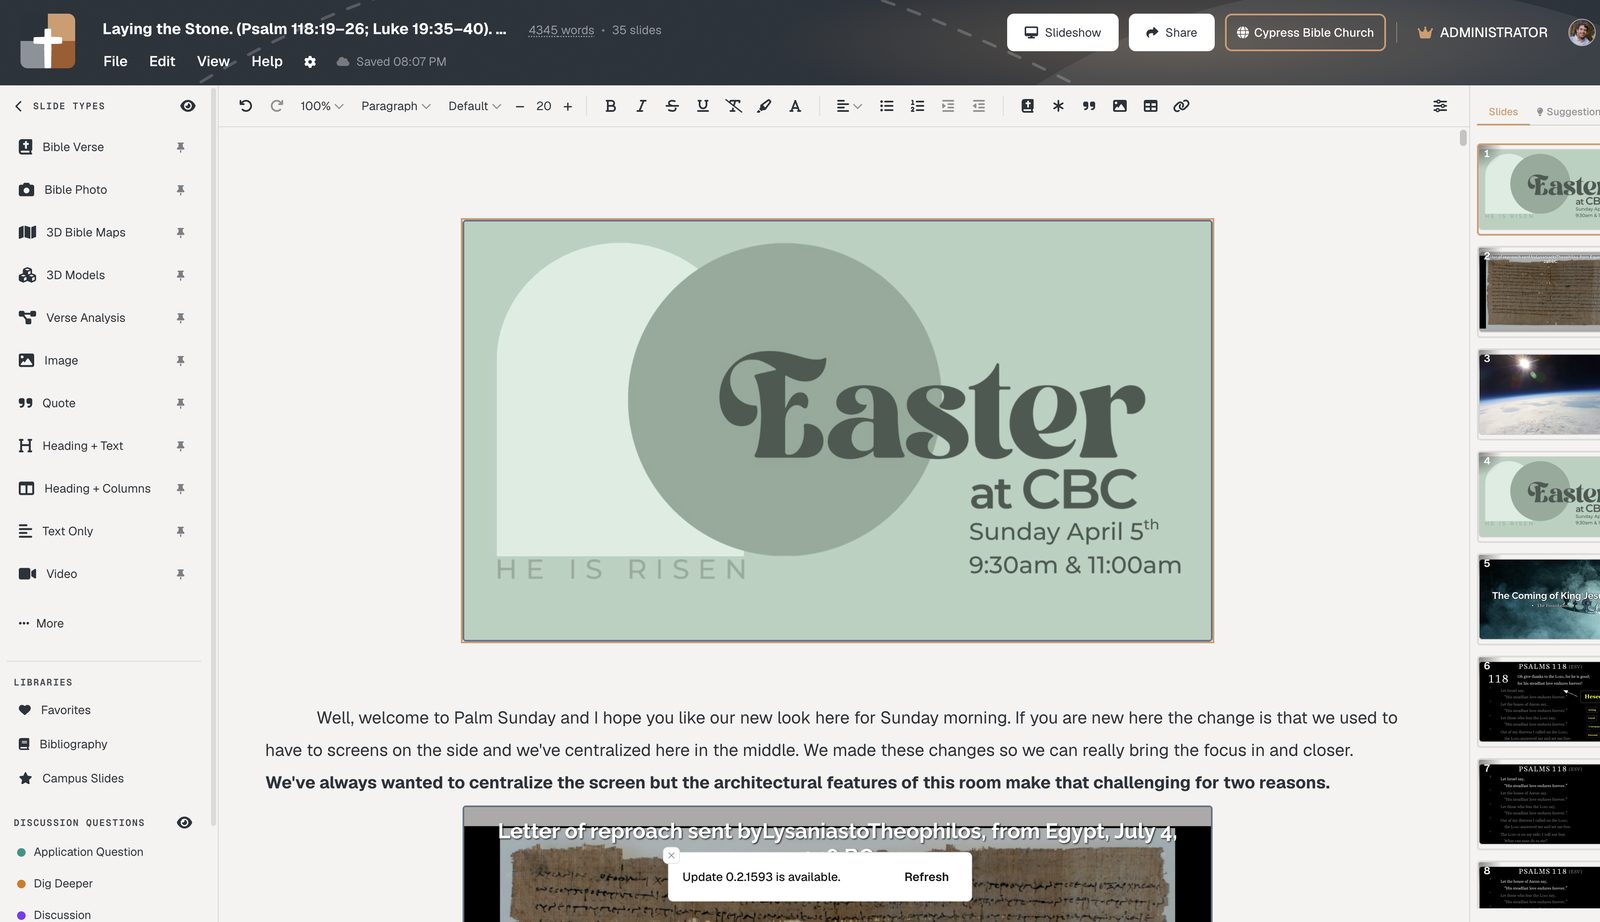
Tablet presenter tip: step chips labeled like 2: Highlight +1 keep you oriented without looking at the big screen. Security messages can land on the tablet only — never over the marked verse.
A simple prep workflow (15 minutes)
- Open Projects and insert a Bible Verse slide for the passage
- Focus or dim so one verse (or short range) is primary
- Add annotation steps for the 2–4 phrases you’ll emphasize
- Optional: one Ω callout or label for a key word
- Type a one-line note under the slide for each advance
- Practice once → present
For a tool-level contrast with PowerPoint pens and duplicate slides, see Bible slide annotations vs PowerPoint.
FAQ — bible annotation & markup
Is this the same as highlighting in a study Bible app?
No. Study markup is for you. BibleSlides markup is a presentation sequence the congregation watches.
Can I annotate any translation?
Bible Verse slides pull from available API.Bible translations (NKJV, NASB, CSB, KJV, NLT, and more). Markup attaches to the verse slide you’re teaching.
What if I improvise on Sunday?
You can still skip or linger on steps. You’re not locked to a video — you’re advancing a prepared sequence.
Does bible markup work for small groups / Zoom?
Yes — large type plus one reveal at a time reads better on compressed video than a full page of neon highlights. See project Scripture on Zoom.
Start marking Scripture the room can follow
Open Projects and create a Bible Verse slide →
Add one annotation step on this week’s key phrase. Present it once in practice mode. That’s bible markup done for teaching — not for a private notebook.
Related guides
See BibleSlides features
Notes and slides in one document, Bible Verse slides, stepped markup, Verse Analysis, 3D maps, BiblePlaces photos, and tablet presenter apps — built for pastors who teach Scripture.