Draw the shape of the passage — Powerpoint Draw
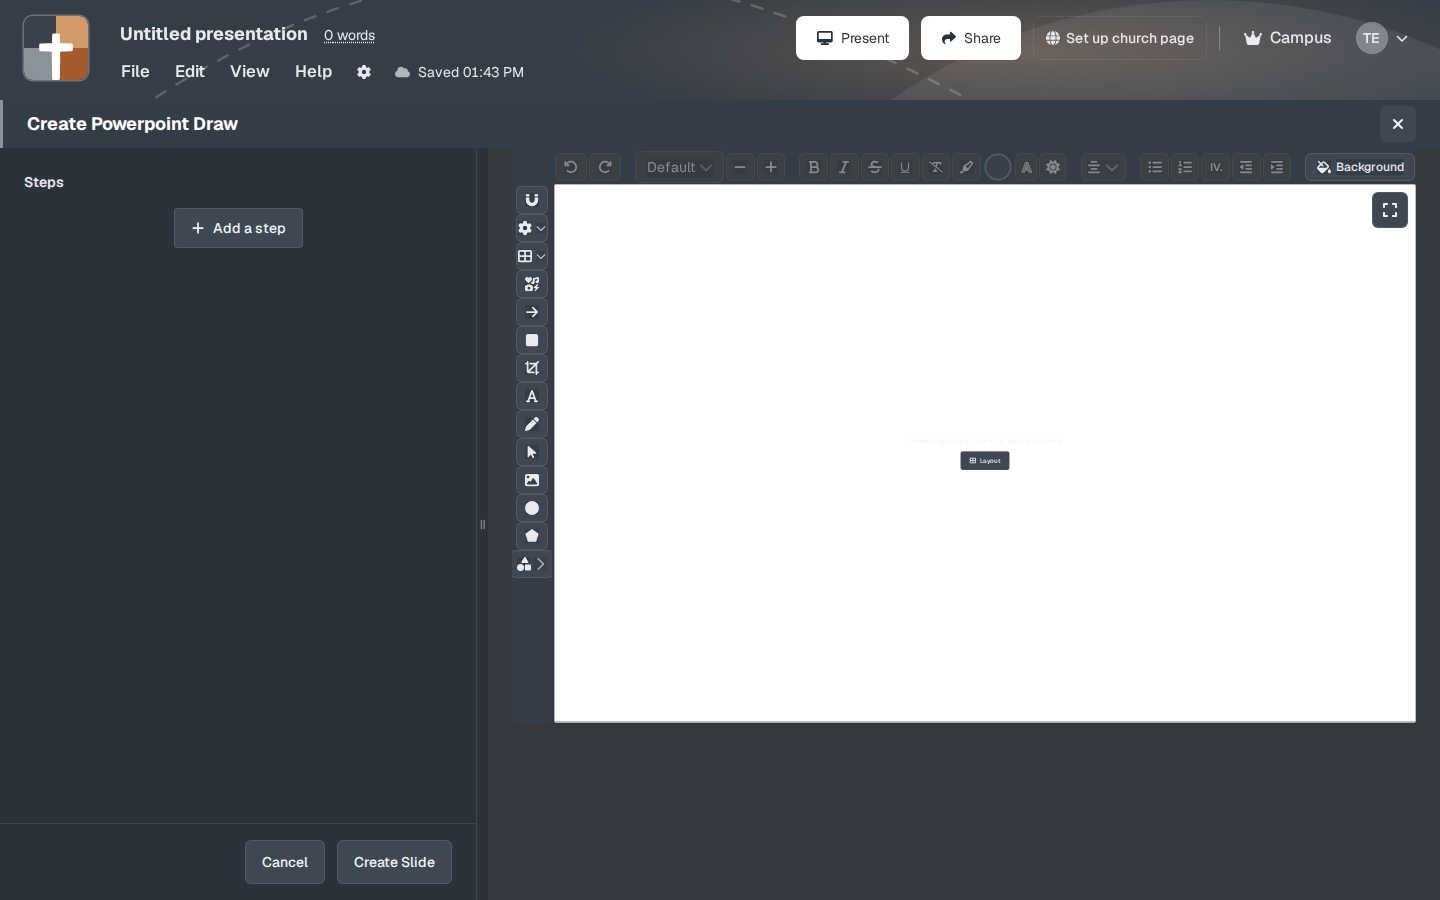
Powerpoint Draw in BibleSlides is the blank canvas for a diagram you build: text, shapes, lines, and icons. Choose a layout such as Comparison when the passage has two columns. Add a step copies the frame you are on, so the next click can bring in the arrow or the word. Separate slides puts each click in the editor and on the tablet. same slide keeps those clicks on one slide.
You have finished Ephesians 2:1–10. The verse was just on the screen. The sentence you are about to say has a shape: dead in trespasses, then alive with Christ, and the hinge is grace. Two columns and one arrow will let the third row see that shape while you say it. Then you come back to the text.
Powerpoint Draw in BibleSlides is that canvas. You place the words, the boxes, and the line. The room reads the frame you have reached.
The diagram is a window onto the sentence you just taught. Build it from that sentence, put it up while you are in the sentence, and leave it when the text is finished.
Which slide holds the figure
| Moment | Slide |
|---|---|
| Read the passage | Bible Verse |
| A heading and the points the room should repeat | Outline |
| What two truths share, and what stays distinct | Venn Diagram |
| Amounts, a line over time, or parts of a whole | Chart |
| A diagram you lay out yourself, and reveal in the order you will say it | Powerpoint Draw |
| A sketch in the moment that should not be filed in the sermon | Board |
Verse Analysis colors the parts of speech on the verse itself. Powerpoint Draw is the figure in your own words and shapes. A book study keeps that figure in the same document as the notes.
Open the canvas
In the sidebar the section is SLIDE TYPES. The hint under it reads Click a type to add a new slide. Choose Powerpoint Draw. On a new account it sits in that list, between Image and Heading + Columns. The catalog line reads Add text, shapes, and images on a blank canvas.
The hover says Press, then the shortcut, which starts as Ctrl+Shift+9 (Cmd+Shift+9 on a Mac). Help → Keyboard shortcuts lists that same entry as Diagram. The shortcut for that list starts as Ctrl+/ (Cmd+/ on a Mac).
More slide types opens the full catalog when your list has been shortened. The dialog reads: Click on any slide type to open it. Use the pin button to add or remove slide types from the sidebar menu. Drag and drop to reorder.
The window title is Create Powerpoint Draw. The empty canvas says Choose a layout to get started or just start drawing. Create Slide saves the canvas into the deck. Cancel discards it.
Start from a layout, or from a blank page
Layout opens Apply layout. Pick the arrangement before you draw. Applying a layout replaces what is on the canvas with that arrangement. Words you already typed in a title or a body placeholder stay when the new layout has a matching place for them.
| Layout | What it places |
|---|---|
| Title Slide | A title and a subtitle |
| Title and Content | A title and one body |
| Section Header | A title and a subtitle, centered |
| Two Content | A title and two columns |
| Comparison | A title, two headings, and two columns |
| Title Only | A title |
| Blank | An empty canvas |
| Content with Caption | A narrow column and a wide column |
| Picture with Caption | A narrow column and a picture box |
| Title and Vertical Text | A title, a wide column, and a narrow column |
| Vertical Title and Text | Two tall columns |
A title placeholder reads Click to add title. A subtitle reads Click to add subtitle. A body reads Click to add text. Click the placeholder and type the words you will actually say.
Comparison is the usual start for a two-sided sentence. Blank is the start when the figure is a few boxes and a line, and a column layout would only get in the way.
What the toolbar draws
The toolbar’s accessible name is Custom slide design tools. The name of each tool is its hover.
- Select and move
- Add text
- Add image
- Rectangle (Shift/Ctrl for square)
- Oval (Shift/Ctrl for circle)
- Line arrow (stroke with arrowhead)
- Line (no arrowhead)
- Connector (right-angle line, snaps to nodes)
- Polygon (pick sides — 3 triangle, 4 diamond; Shift/Ctrl for equilateral)
Shapes holds the rest: Triangle, Diamond, Cross, Star, Heart, Callout, Block arrow, and the others in that list. Click a tool, then drag on the canvas. Click the tool again to put it down. Add text drops a box that says Text. Click it and type.
Add image opens Insert Image. Undo and Redo sit at the start of the toolbar. Their hovers read Undo (⌘Z) and Redo (⌘⇧Z).
Elements opens a window of the same name. The search field says Search icons. The filters are All, Shapes, Tabler, Lucide, Maps, and Emoji. Click an icon and it lands on the canvas. The window closes. With the icon selected, Color on the bar under the preview recolors an icon from Shapes, Tabler, Lucide, or Maps.
Snap is off until you turn it on. The hover reads Snap to grid, and Disable snap to grid once it is on. Canvas opens the settings: Grid, Snap guides, Infinite canvas, and Background. Each switch reads On or Off.
Grid draws the lines. Snap guides shows the construction lines while a shape snaps. Its hover reads: Show construction lines while snapping. Snap still works when this is off. The canvas opens white. Background sets the slide color.
Drag across empty canvas to select several shapes. Shift-click, or Ctrl-click (Cmd-click on a Mac), adds another shape to the selection. The bar on the selection offers Duplicate, Lock, Bring forward, Send backward, and Delete. Right-click for Copy, Paste, Group, Ungroup, Align to page, and Layer. Group keeps a box and its label together when you move them. The shortcut list names that Group objects (Diagram).
With a shape selected, the bar under the preview includes Fill, Stroke, and Transparency.
One frame per click
Leave the drawing as one slide when the room should see the whole figure at once. A closing recap is that kind of moment. You never press Add a step.
Press Add a step when the next sentence adds a piece. The new step starts as a copy of the frame you are looking at. What you then add, move, or delete belongs to that step. The earlier step keeps the frame you left. An empty step stays empty on the next Add a step, so draw on the step you mean to copy.
Home appears in Steps once a step exists. Home is the first frame.
Where steps live appears under Steps once a step exists.
| Choice | What Sunday does |
|---|---|
| Separate slides | Each step becomes its own slide in the editor and on the tablet. This is where the control starts. The line under it reads: Each step becomes its own slide in the editor and on tablet. |
| same slide | The clicks stay on one slide. The line under the control reads: Advance on one slide with buttons. No extra slides in the editor or on tablet. |
On the projector and on the tablet, each click shows that step’s frame. The house screen shows the copy, plus whatever you added on that step, and it omits whatever you removed there. You advance the clicks. The steps do not play on a timer.
The step row names the last thing on that step. A rectangle reads Rectangle. The word Grace, added last, reads Grace. The row is numbered, so the first step is 1: Grace.
Focus box is on the same toolbar when a step needs a dim window. Its hover reads Focus box. The pen beside it has the accessible name Scribble (freehand on presentation step). Focus boxes describes that window on a photograph. On this canvas the usual reveal is the next frame of the diagram.
Ephesians 2, one click at a time
Open Layout and choose Comparison. The placeholders read Click to add title, Click to add subtitle, and Click to add text.
| Place on the canvas | Words |
|---|---|
| Click to add title | Ephesians 2 |
| Left Click to add subtitle | Dead |
| Right Click to add subtitle | Alive |
| Left Click to add text | trespasses and sins |
| Right Click to add text | raised with Christ |
That frame becomes Home once you add a step. The room can see both sides before you name the hinge.
Add a step. Draw a line arrow from the left column toward the right. Add text, and type Grace last. The step row reads 1: Grace.
Add a step again. Under the right column, Add text and type Works. The step row reads 2: Works. Say Ephesians 2:10 while that word is on the wall, then return to the Bible Verse slide.
Leave Separate slides when each of those is its own moment in the notes and on the tablet. Choose same slide when you want a single slide and the buttons.
When the figure is larger than the slide
Infinite canvas is off until you need room past the slide edge. In Canvas, turn Infinite canvas On. With Select and move on, hold Space and drag to move the canvas. The scroll wheel zooms. Canvas zoom and Reset view sit under the preview. The preview window is the slide. What sits inside that window is what the projector shows.
Each step keeps the pan and zoom you left it on. The house screen eases to that view on the click. Turn Infinite canvas Off to come back to the slide. The view resets.
Use this when a long chiasm or a wide comparison will not sit in one frame at a readable size. For two columns and an arrow, leave it off.
Saturday
- Stay in the passage. Insert Powerpoint Draw after the verse you will explain.
- Open Layout and choose Comparison, Two Content, or Blank. Type the words you will say. Then draw the line.
- Turn on Snap when two boxes should share an edge. Open Canvas and turn Grid on if you want to see the lines.
- Leave the slide as one frame when the room should see the whole figure.
- Press Add a step for the next sentence. Add the arrow or the word on that step. The row names the last thing you added.
- Under Where steps live, leave Separate slides when each click belongs in the editor and on the tablet. Choose same slide for one slide.
- Advance the clicks once in the editor, then the same order on the tablet.
FAQ
The next click is missing a shape I drew. What happened?
Add a step copies the frame you are looking at. A shape drawn on a later step stays on that step. Go back to Home, or to the earlier step, to change the frame the room sees first.
Apply layout cleared my boxes. What happened?
Apply layout replaces the canvas with that arrangement. Pick the layout first, then draw. Words already sitting in a title or body placeholder are kept when the new layout has a place for them.
What does the first click show?
Home, the frame you built before Add a step. With no steps, the whole drawing is the slide.
Who advances the frames?
You do. The steps wait for your click.
Related guides
See BibleSlides features
Notes and slides in one document, Bible Verse slides, stepped markup, Verse Analysis, 3D maps, BiblePlaces photos, and tablet presenter apps — built for pastors who teach Scripture.